 Pulling In Visitors
A picture can speak 1,000 words. Graphics can add a lot of flair to your web site. They put your words into images and grab the attention of the reader. How many articles have you clicked on, because the picture was intriguing?
Too many graphics can also be a deterrent to visitors. The more graphics you have, the longer your web page takes to load. In a world of instant gratification, if users have to wait, they cancel your page and go on to something else. You must use your own judgment to find that happy medium.
You also don’t want to use graphics that are too large for you article. I don’t mean taking up white space, and condensing your paragraphs to a tiny column next to the image. I mean taking up disk space which affects load time when you’re page is accessed through a browser. Remember not everyone is on a high speed internet connection. But even if they were, you don’t want people waiting for your page to load, because the image files are too large.
The typical desktop image today is 1366 pixels wide, by 768 pixels high. On average, a file with these dimensions can be around a 3 megabyte file. Now that doesn’t sound like a lot, but the more colors in the image, the bigger the file. And when you start adding 3 or 4 images to your articles and they’re all this size, a visitor is waiting for each one of those files to load.
It doesn’t matter if you’ve set the dimensions on the file to appear smaller. The web browser is still loading the entire 3meg file. So you want to resize your images before you upload them, unless your intent is to share a full size desktop image.
You can use any graphics editor to do this. Most come with some form of resize tool built-in. A good general size to stick with is 350 pixels wide, by 450 pixels high. As a comparison, most background images for cell phones are 330×480 for portrait, or 500×330 landscape.
There are three types of graphic files that can be used on a web page. These file types are identified by their file name extension. JPGs, GIFs and PNGs
- JPGs compress image data by reducing sections of images to blocks of pixels or “tiles.” JPG compression was designed to store large pictures in crisp color and detail, at least what was allowed at the time of this formats creation.
- GIFs do not contain as many pixels as a jpg so they’re not as large in size. But, the smaller number of pixels can also mean the loss of detail or clarity within a picture. Apart from supporting transparency, GIF also is supports animations, limiting every frame to 256 pre-selected colors.
- Both JPGs and GIFs are older formats and they each lack the finesse that modern technology has provided. So as technology has grown and progressed, so must file types to keep pace. That brings us to PNGs. PNG supports 8-bit color like GIF, but also supports 24-bit color RGB, like JPG does. They’re compression algorithm has been updated so that they can preserve color and detail, but they can still be transparent, or be used for animation like GIFs. They are the new Web 2.0 version for graphic usage.
Coding Images In HTML
The code for an image is relatively simple. But like most things in the HTML there are additional parameters that can help you place an image on your page so it’s in just the right place.
 <img src= “images/swdesign.gif”> |
HTML editing packages and blog page or post editors all provide a feature for a ‘click & add’ of graphics. The command to add a graphic is very simple.
|
 . |
You can use a graphic like the one to the left to create a link to another page within your web site. Or to someone else’s web page entirely. Within an html or blog editor, you can usually click on the graphic, then type the web address in some field the tool provides. . But the command will look like this: <img src=”images/swdesign.gif”> . In Web 1.0 you had to tell the image to remove the link box border that surrounds the image. In Web 2.0, no border is now the default, Yeah! . You can also add a label or notice to the graphic that will appear when a visitor places their mouse pointer over the image. That command will look like this: <a href=”https://springwolf.com/infotech“> <img src=”images/swdesign.gif” border=0 alt=”Back To The InfoTech Section”> . Place your mouse over the lower SpringWolf Designs image and you’ll see the ‘alt’ message appear. |
|
This image has In an HTML Editor |
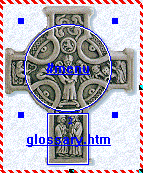
An ImageMap is a graphic that has been formatted with “hot spots”. Hot spots allow you to use an image or different parts of an image to link users to several different sections, or pages of your site, or to someone else’s web page entirely. . Creating an ImageMap isn’t as hard as you might think, but they aren’t used very often today. Image Mapping is typically used for gaming and those hotspots are coded in advanced programming language and not standard HTML. . The following is an example of a simple image map command used for the graphic to the left.
. |
Animated Graphics |
An animated graphic can come in many forms.
The most common animated graphic file is called a multi-part image, such as the one to the left. A multi-part image is just what it sounds like. Multiple images of something that when put together in a single file looks like the image is moving. |

Happy Imaging!
I like your pink people!